Set Up OpenClaw on Your Cloud Desktop
Follow these steps to configure your AI agent. Takes about 5 minutes.
Get Started
Click the Terminal icon in the taskbar, then run the setup command:
Initial Setup
The wizard will ask a few quick questions before getting to the important stuff. Here's what to pick:
You'll see a safety notice about OpenClaw having full access to the computer.

Since this is your own private cloud desktop, it's safe to accept.
Choose how detailed the setup should be.

Quickstart gets you up and running with sensible defaults. You can always fine-tune later with openclaw configure.
Your desktop comes with OpenClaw already pre-configured. The wizard asks what to do with these existing settings.

Use existing values keeps the pre-installed configuration and only asks you to fill in what's missing (your AI provider and API key).
Choose Your AI Provider
Pick which AI company will power your agent. You'll see a list like this:
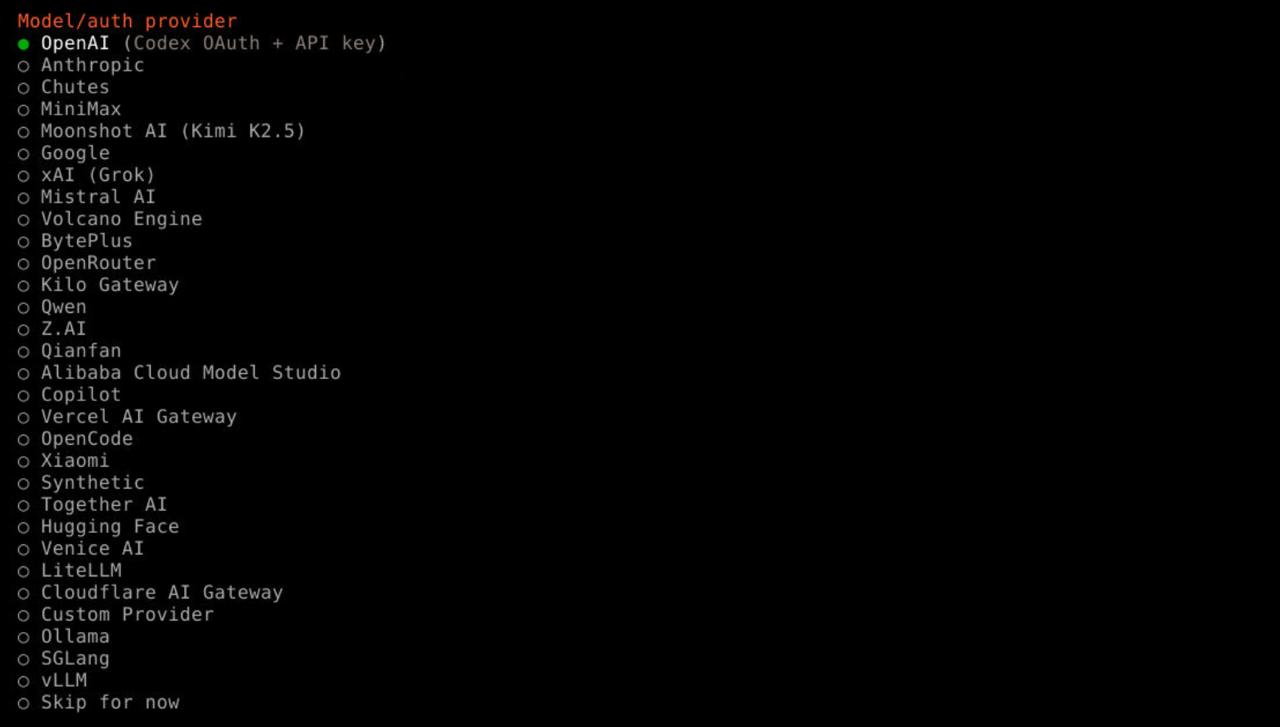
We recommend one of these:
Anthropic
Claude models. Best at coding and reasoning.
BEST FOR CODINGGemini models. Best for huge context windows and multimodal tasks.
FREE TIEROpenAI
GPT models. The most widely used AI, great all-rounder.
BEST ALL-ROUNDEROpenRouter
One API key for 300+ models (Claude, Gemini, GPT and more). Free credits included.
EASIEST TO START
Just getting started? Use OpenRouter. One API key unlocks 300+ models (Claude, Gemini, GPT and more), and you get free credits with no credit card required.
Want to try for free? Go with Google. Gemini has a free tier and handles large files and images well.
Want the best quality? Choose Anthropic (Claude). Top-tier for coding and reasoning.
Already have an OpenAI account? Use OpenAI. You can reuse your existing API key.
Authentication Method
Choose how to connect to your AI provider. Click each option below to see the instructions:

Use this if you're paying per usage (pay-as-you-go). You'll get an API key from your provider's dashboard, paste it in, and only pay for what you use. This works with all providers.

Select "Paste API key now" when prompted, then paste your key.
Choose your provider to see how to get your API key:
Get your Anthropic API Key
- Go to console.anthropic.com
- Create an account or sign in
- Go to Settings → API Keys
- Click Create Key
- Copy the key (starts with
sk-ant-...) - Add at least $5 in credits under Plans & Billing
Get your Google Gemini API Key
- Go to aistudio.google.com/apikey
- Sign in with your Google account
- Click Create API Key
- Copy the key (starts with
AIza...)
Google Gemini has a free tier: 15 requests per minute and 1 million tokens per day. No credit card needed.
Get your OpenAI API Key
- Go to platform.openai.com/api-keys
- Sign in or create an account
- Click Create new secret key
- Copy the key (starts with
sk-...) - Add credits under Billing → Add payment method
Get your OpenRouter API Key
- Go to openrouter.ai/keys
- Sign in or create a free account
- Click Create Key
- Copy the key (starts with
sk-or-...)
New accounts get free credits, no credit card needed to start. OpenRouter gives you access to 300+ models including Claude, Gemini, GPT, Llama and more, all with one API key.
Linux / Windows: Ctrl+Shift+V or right-click → Paste
Mac: ⌘+V works as usual
Your API key is like a password. Never share it publicly. It stays securely on your cloud desktop.
Use this if you have an active subscription (like a ChatGPT Plus, Claude Pro, or Google One AI Premium plan). OAuth lets you sign in with your existing account through the browser. No API key needed. Your subscription covers the usage.
Select "CLI OAuth". A browser window will open. Sign in with your provider account and grant permission. The terminal will confirm the connection.
Not all providers support OAuth. Currently available: OpenAI (Codex), Google, and GitHub Copilot. If your provider doesn't support it, use API Key instead.
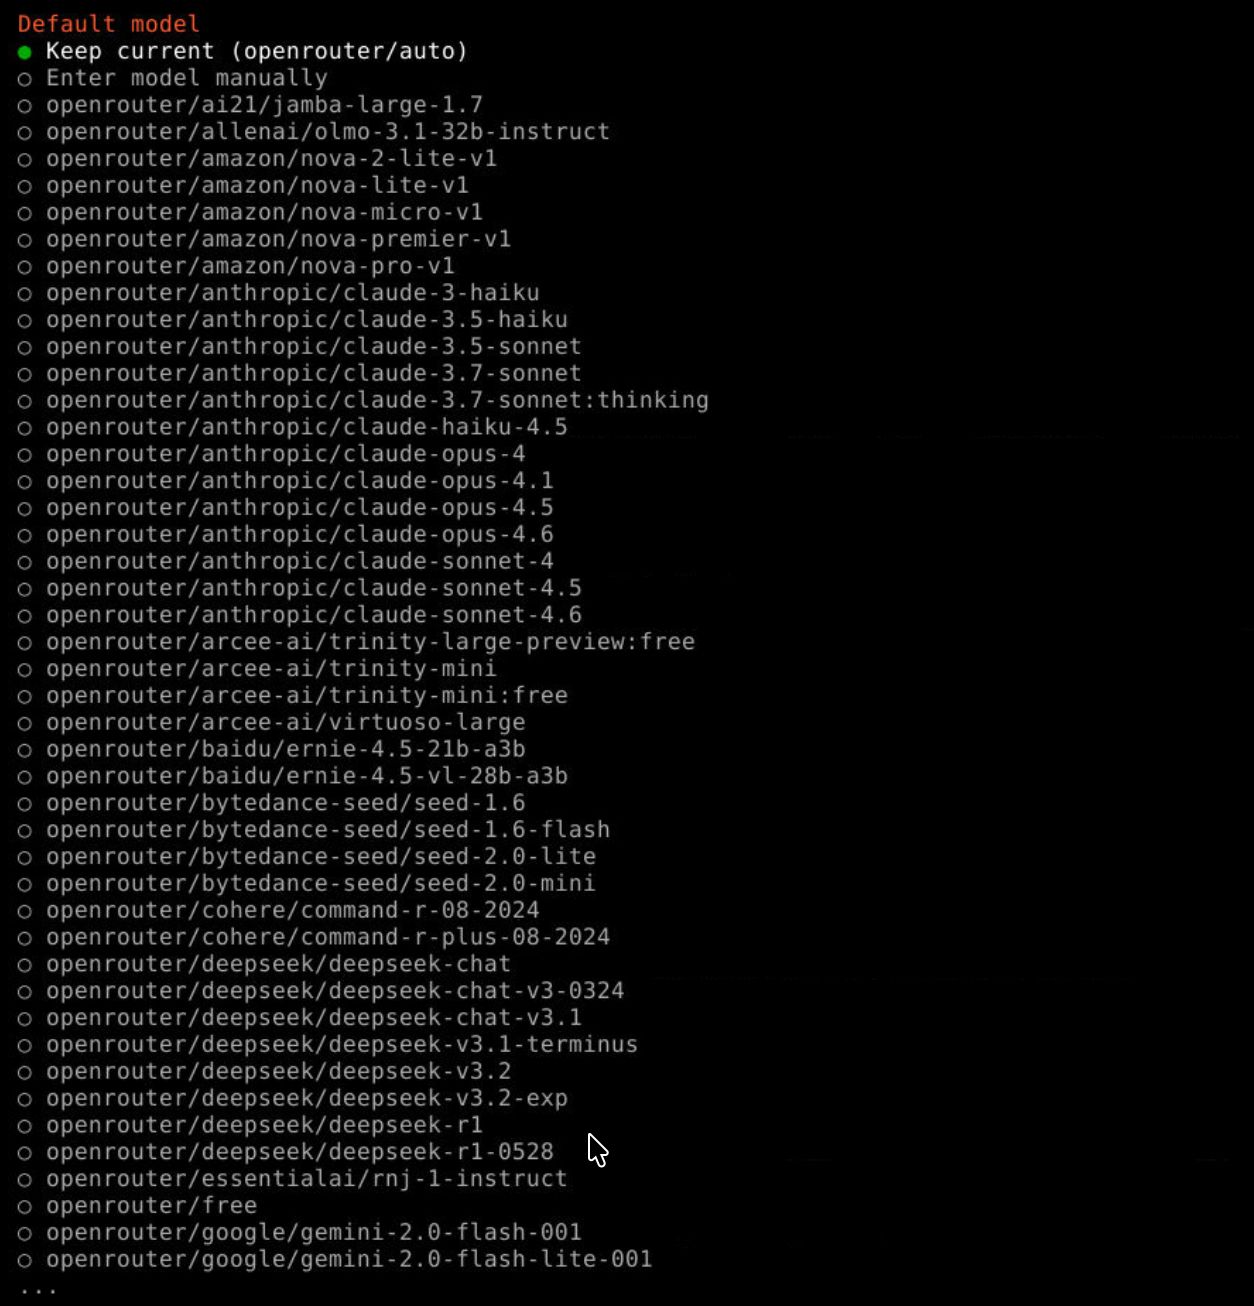
Choose Default Model
The wizard will ask you to pick a default AI model. We recommend:
Recommended: claude-sonnet-4-6
Good mix of speed and quality. Works well for most tasks.
Other options:
claude-haiku-3-5- Faster, cheaper, good for simple tasksclaude-opus-4-6- Most powerful, slower and costs more

Recommended: gemini-2.5-flash
Fast, smart, and works within the free tier. Perfect for getting started.
Other options:
gemini-2.5-pro- More powerful, still affordable

Recommended: gpt-4o
OpenAI's most versatile model. Fast and reliable.
Other options:
gpt-4o-mini- Cheaper, good for simple taskso3- Advanced reasoning, slower but very capable

Recommended: anthropic/claude-3.5-sonnet
Access hundreds of models with a single API key.
Other options:
google/gemini-2.5-flash- Fast and cheapmeta-llama/llama-3.1-70b-instruct- Strong open-source option
Connect a Channel
You can connect your agent to a messaging app. The wizard shows several options:
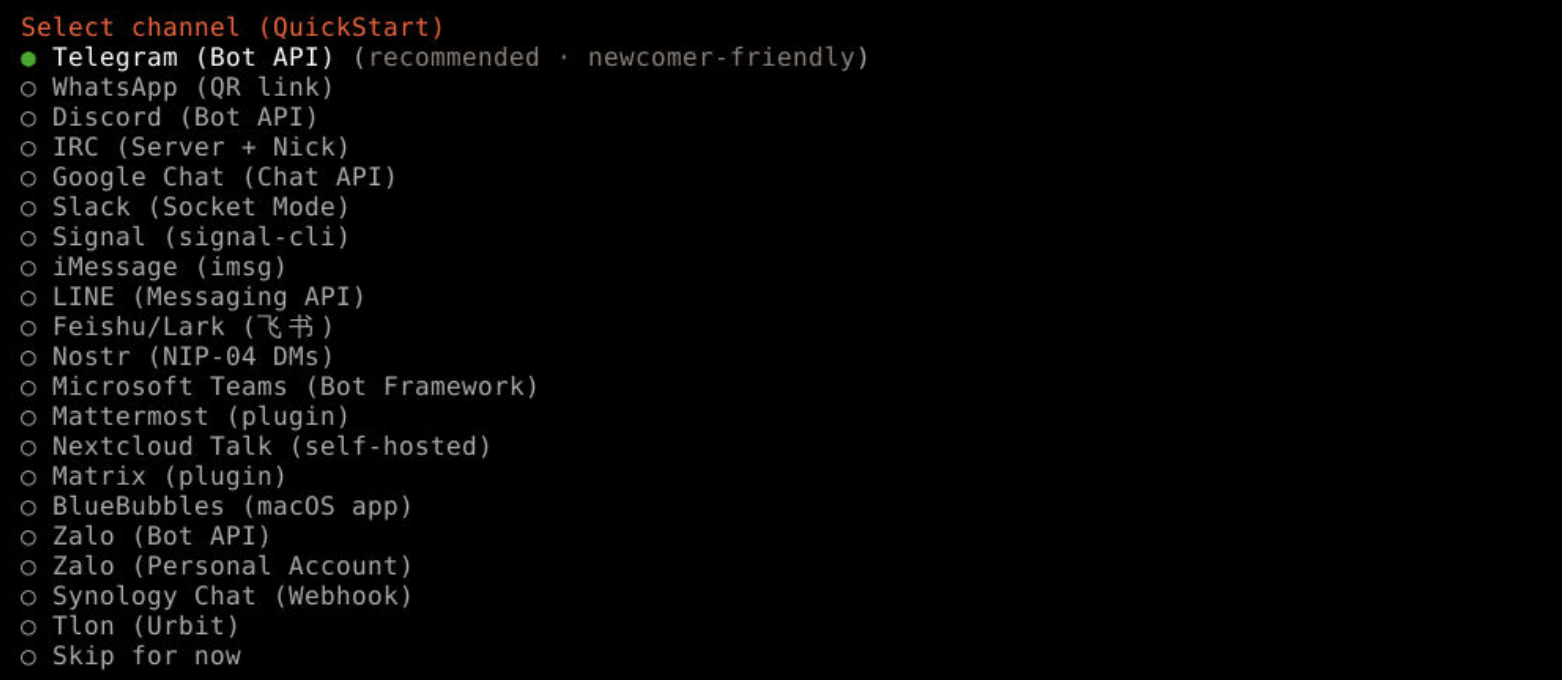
Telegram Bot
Connect your agent to Telegram so you can chat with it from your phone.
- Open Telegram and search for @BotFather
- Send
/newbot - Follow the prompts to name your bot
- BotFather will give you a token. Copy it.
- Paste the token when the wizard asks for it
WhatsApp (QR Link)
Connect your agent to WhatsApp. The wizard will display a QR code.
- Select "WhatsApp (QR link)" from the channel list
- A QR code will appear in the terminal
- Open WhatsApp on your phone
- Go to Settings → Linked Devices → Link a Device
- Scan the QR code
WhatsApp linking uses your personal WhatsApp number. The agent will be able to read and reply to your messages. Use with care.
Skip for Now
You can skip this step and set up a channel later. You'll still be able to use OpenClaw by opening the dashboard directly from your terminal.
To add a channel later, run:
Final Options
The wizard will ask a few more questions. Here's what to choose:
The wizard asks if you want to configure a web search provider. You can add this later.

Skills are optional plugins that add extra capabilities to your agent. You can enable them anytime from the dashboard.

Hooks are advanced automation triggers that run when certain events happen. You won't need these right now.

You're All Set!
OpenClaw is now configured and running on your cloud desktop. Run this command in your terminal to open the web dashboard and start chatting:
Or use your connected Telegram / WhatsApp to chat with it from your phone.